Great graphic designer – 02. layers and appearance
In the previous article, I was discussing how important effective work with layers is. Here, I would like to delve more into using the ‘Layers’ panel and their combination with the ‘Appearance’ panel.
Layers and appearance are one of the panels that I use most often when working and they are great aids when used properly.
LAYERS PANEL
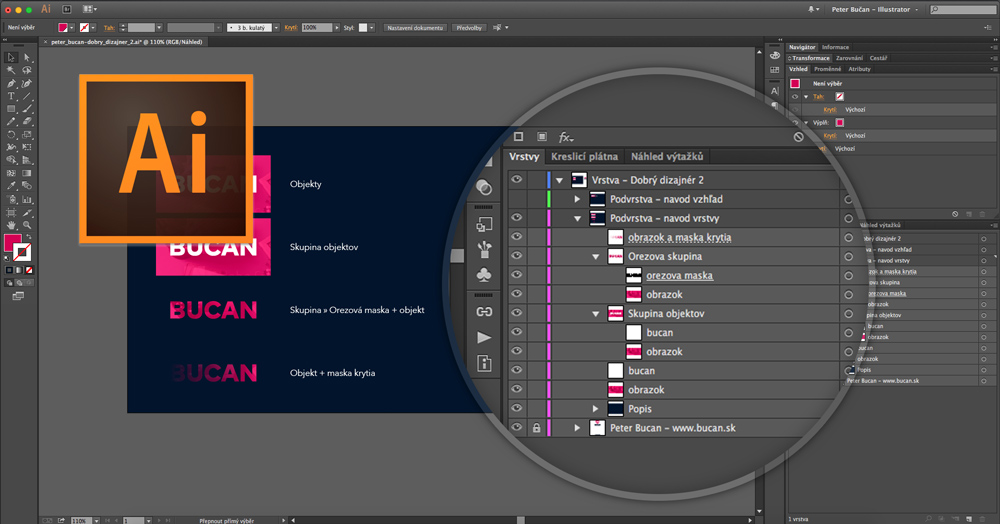
We can work with layers, sublayers, groups, objects, clipping masks, we can label them, we can also use basic opacity masks which are applied directly to the object and their options will show up when the ‘mask mode‘ is enabled.
In the settings for layers and sublayers, we have the option to set the colour depth, the visibility, to lock the layer, print etc. We then create objects in the layers, which we can group depending on what we need. Objects and groups can be locked or made invisible. We use clipping masks for group of objects / objects that we want to crop out.
› Masks
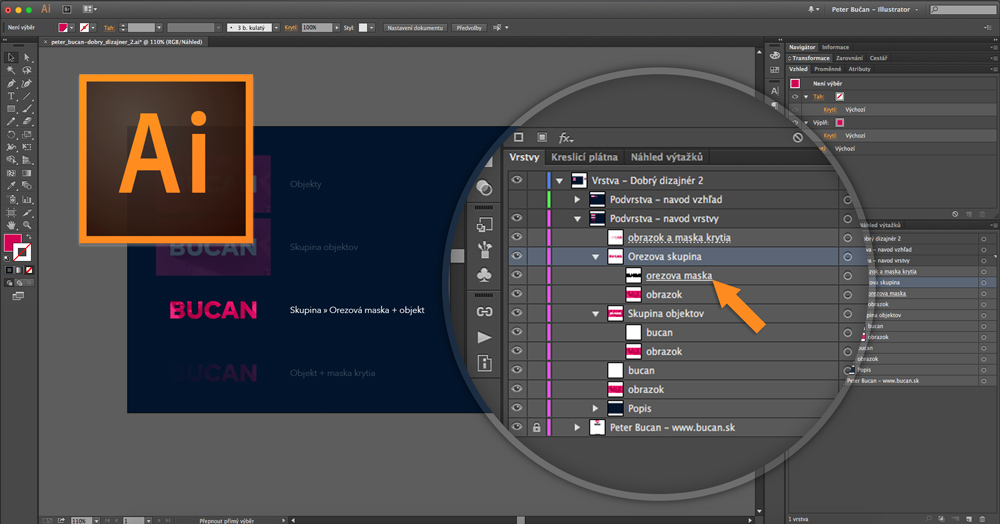
Seeing clipping masks in layers is very easy – it is the layer whose name is underlined. A vector shape creates sharp boundaries that helps us view the object we are masking.
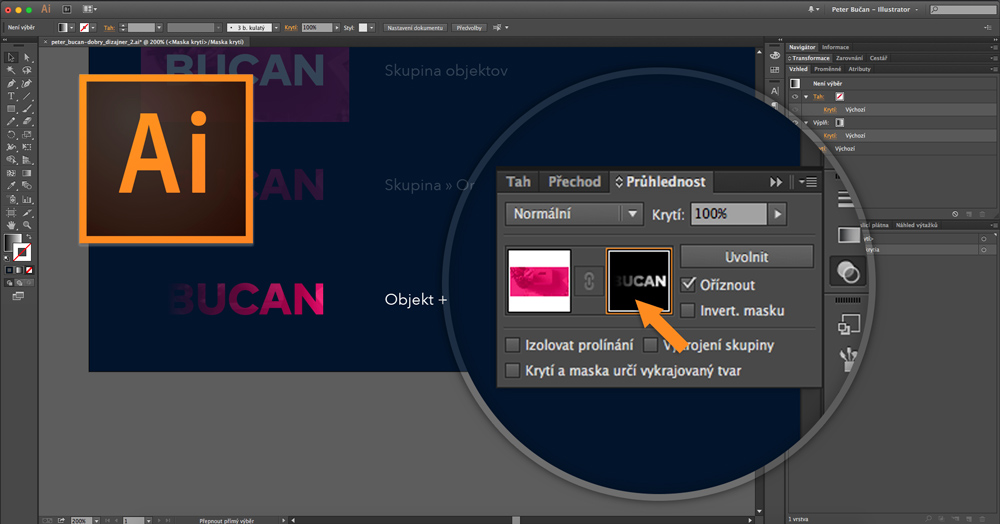
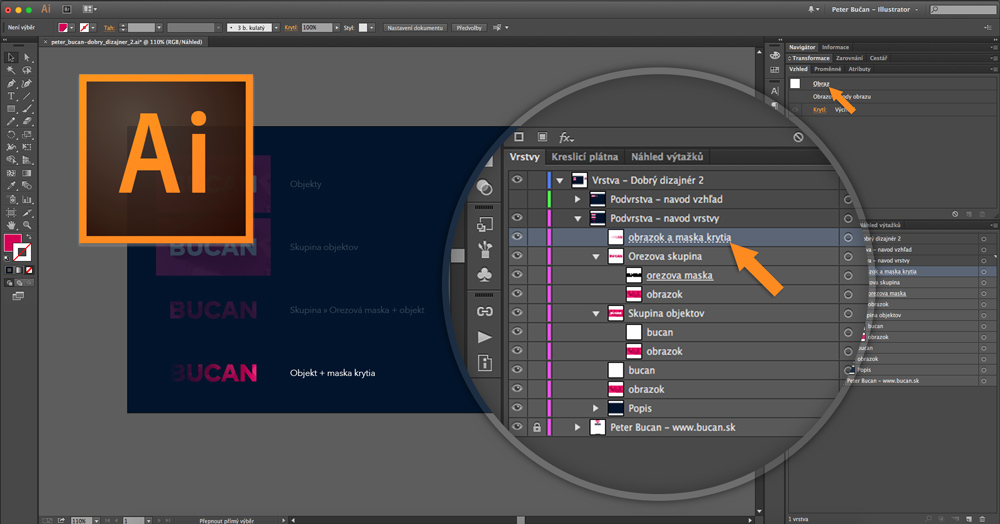
If we want to ‘fade‘ the objects, we can use the opacity mask, whose name is marked by a dotted line. This mask is applied directly to the object and therefore also the in the appearance panel we see a dotted line.
TIP – Creating opacity masks
Place the object with gradient opacity over the masked object (a bitmap image can also be used). Choose both objects in the ‘Transparency‘ panel, and click on ‘Make mask‘.
› Working in the Layer Panel
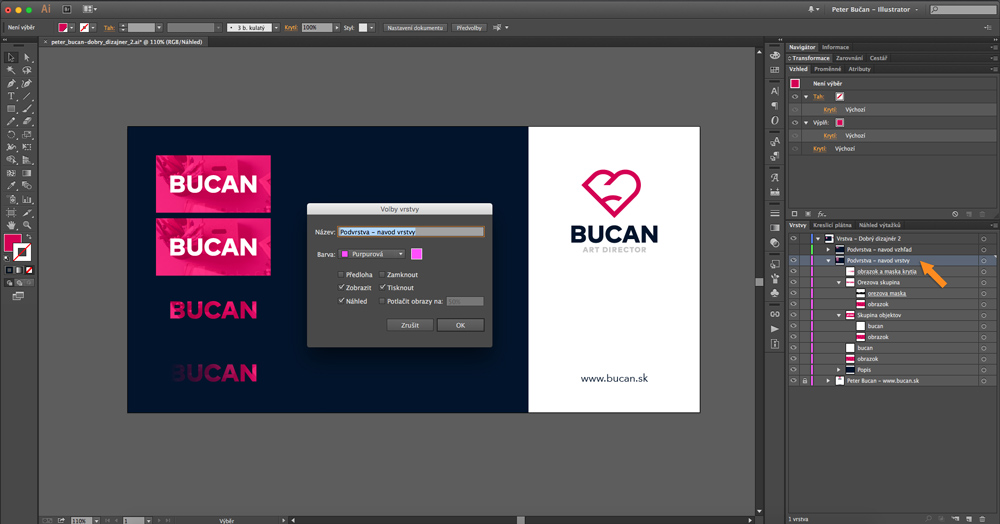
You can edit the name of the panel by double-clicking the name, double-clicking the area next to the name will bring up a pop-up menu with advanced settings.
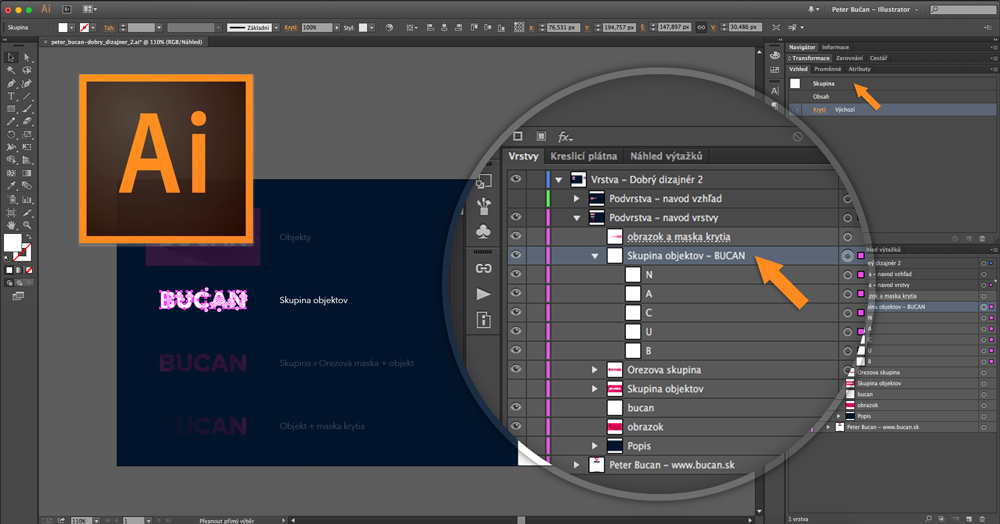
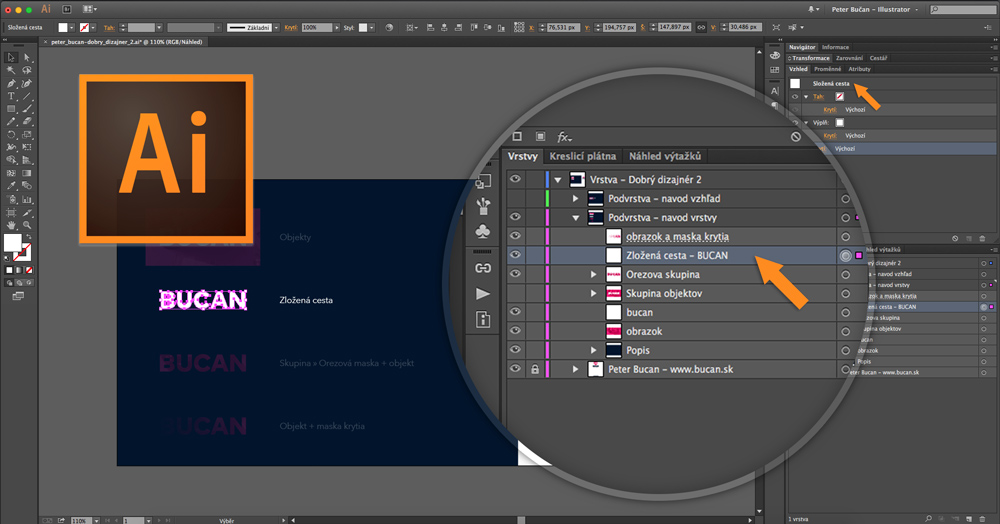
The circle next to the name of the layer indicates the properties of the layer – a full circle tells us that several appearance settings were applied to the object and or it can mean that a compound path was created. I prefer to use this function when having multiple objects of same type (such as Text in curves) and I do not want to have the objects grouped. By clicking on ‘CMD+8’ we create a compound path from the objects and we can work with them more easily. By pressing ‘CMD+Alt+Shift+8’ the compound path is disabled again.
The square on the right side lets us highlight selected objects – by clicking on the square, an object on the canvas is automatically selected, and we can edit it. If we have selected the object on the canvas and we want to find it in the layers panel, click on the magnifying glass at the bottom of the panel menu layers – and the object will be selected automatically.
TIP – Moving appearance in the layers panel
By dragging the circle to a circle of another layer, we can quickly change the appearance of the target layer.
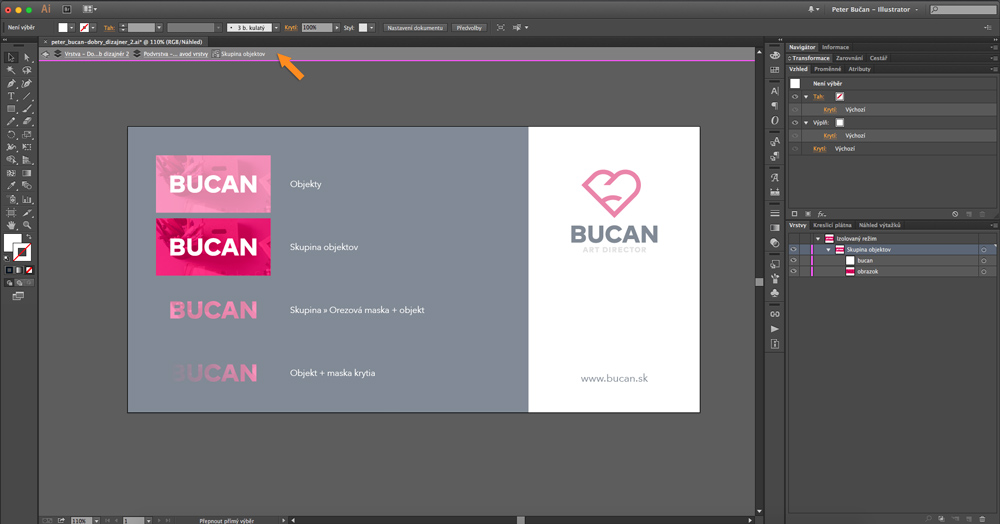
When creating a group of objects, it is possible to work in an isolated mode, which is activated quickly by double-clicking on group of objects on the canvas. A path to the object pops up on the top of the screen, and only active objects from the group we are editing will show up on the canvas.
APPEARANCE PANEL
The most basic elements of the ‘Appearance‘ panel are fill and stroke, which include some interesting settings. Fill and stroke can be used multiple times with different settings, which help up multiple lines or a combined fill in a single object.
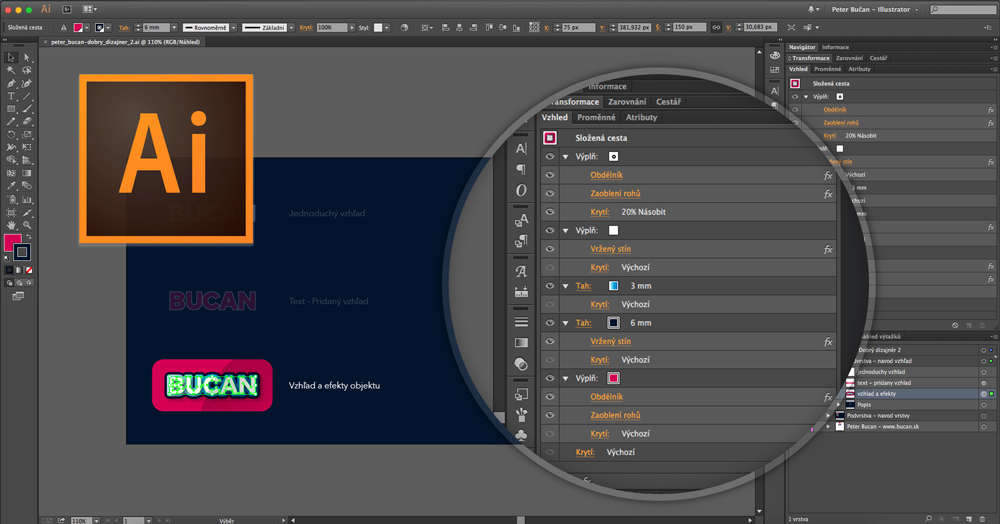
In the following example, I have used multiple settings for lines and fill with the addition of multiple effects and a variety of transparency settings. Using compound paths, I have created an object which contained a rectangular base with rounded corners, multiple lines, a gradient and multiple filler effects. Transparency and different effects can be set for the entire object, but also separately for fill and stroke – so we can also create interesting combinations.
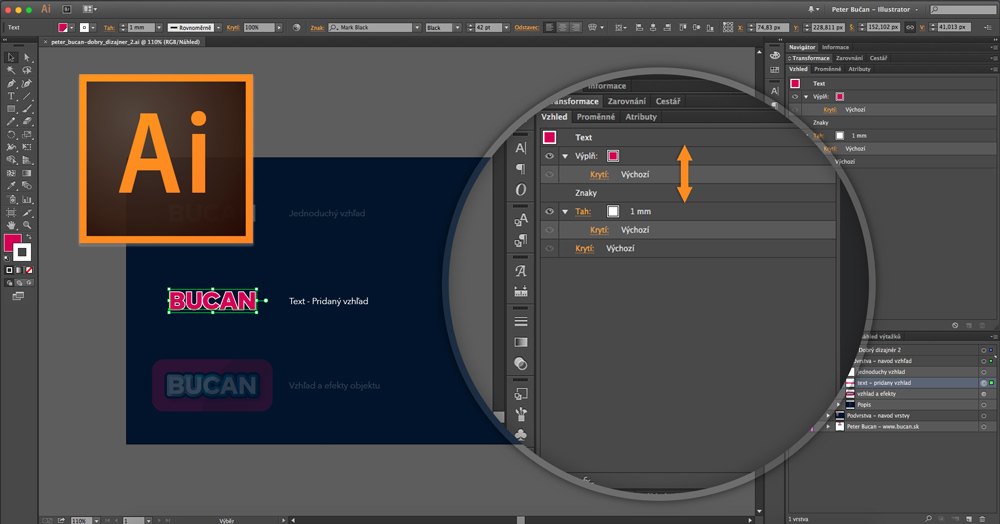
We are able to move around the different settings in the appearance panel, this can also prove useful for text objects for which we want to change the stroke settings. This will automatically split the line in the middle, but since it is a text object, we are unable to use different stroke settings. If you want to create an outline stroke, move ‘Stroke‘ under ‘Characters‘ and thus create a text object with an outline stroke only.
Different appearance settings can be applied not only to objects, but also to groups of objects. Transparent layers present you with new options that you can experiment with and you may find some interesting before unseen combination of these two panels.
